Image to Ink Wash Sketch: Turn Photos into Chinese Brush Ink Art
Learn how to turn an uploaded image into a traditional Chinese ink wash sketch, with tips for silhouettes, white space, brushwork, and ink density settings.
Quick Answer
How do you turn an image into an ink wash sketch?
To turn an image into an ink wash sketch, upload a photo or picture with a clear main subject, choose the ink wash sketch tool, set ink density, then generate the result. The tool uses the original image as a reference for the subject, pose, silhouette, proportions, and composition, then recreates it with black brushwork and soft gray wash.
A good result should feel quiet and intentional. The subject should remain recognizable, but the image should not look like a filtered photo, pencil drawing, cartoon, logo, or watercolor poster. The strongest ink wash sketches use restraint: a few confident dark marks, pale gradients, and large areas of untouched white space.
Example
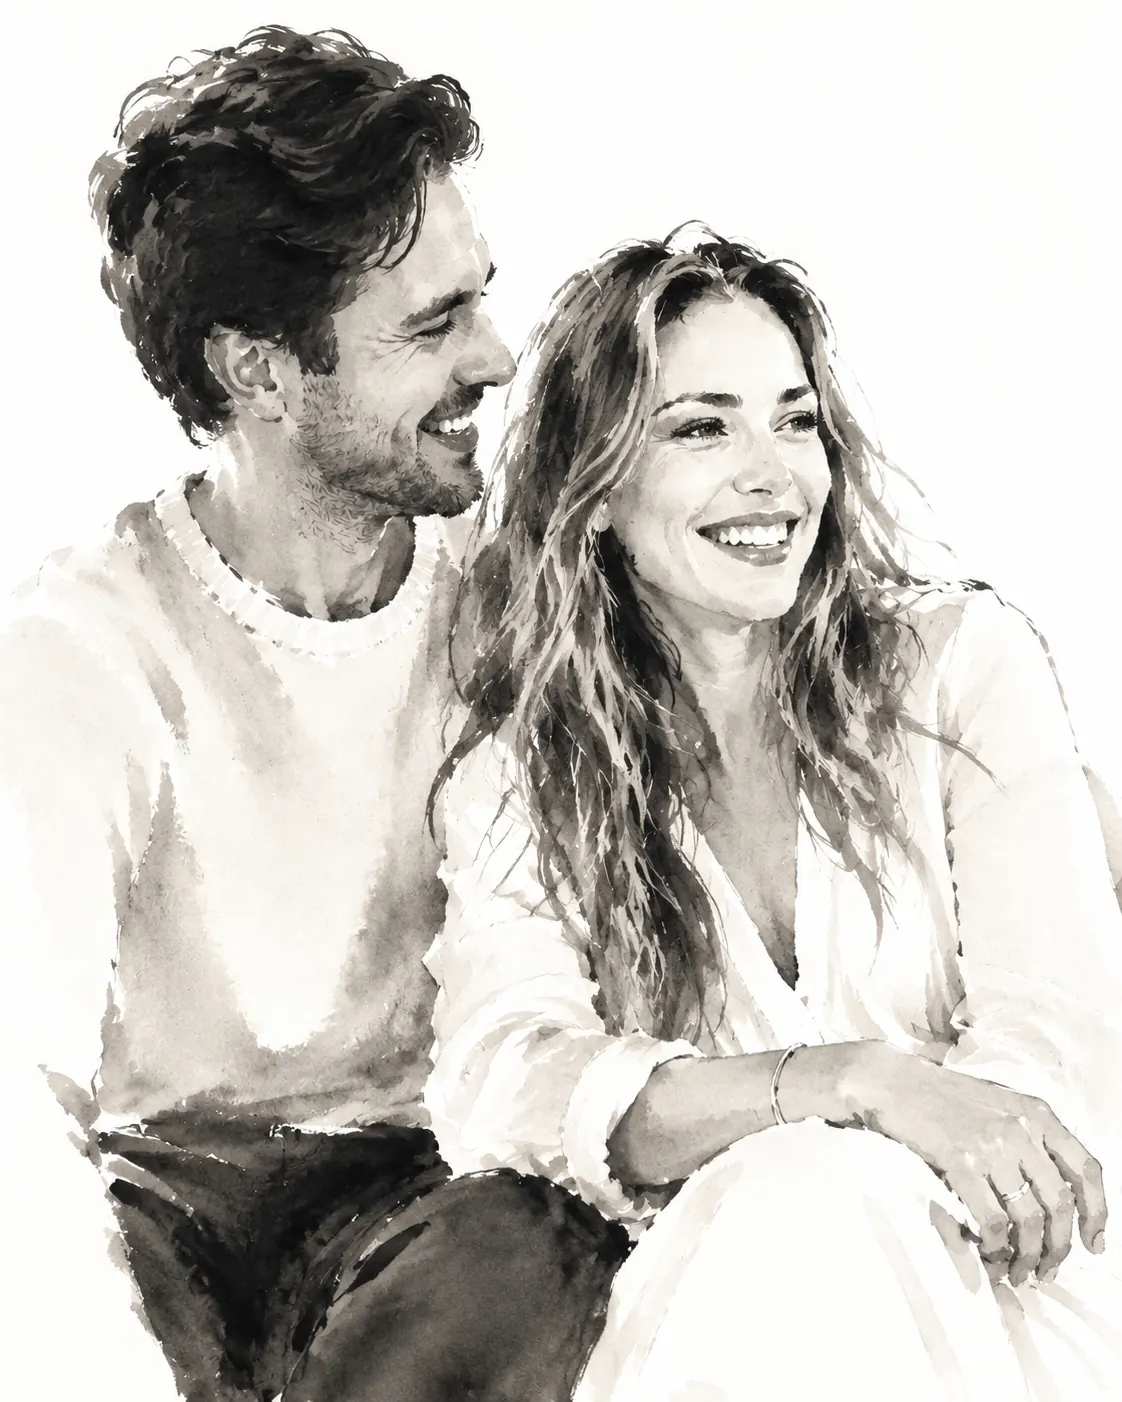
Ink wash sketch example
The example below uses the original image for structure, then simplifies color and texture into a monochrome brush-ink composition. Notice how the result keeps the main relationship and posture while letting the white background become part of the artwork.

Best Inputs
What images work best for ink wash sketches?
Ink wash is good at gesture, shape, atmosphere, and broad value changes. It is less good at preserving tiny details, small letters, exact product labels, or complicated background clutter.
Before uploading, look for one strong subject and a composition that would still make sense if most color disappeared. Portraits, couples, pets, plants, objects, and simple scenes can all work if the subject has readable structure.
- Use photos with one clear main subject rather than crowded scenes with many competing shapes.
- Choose images where the pose, outline, or relationship between subjects matters more than exact color.
- Leave some space around the subject so the white-paper composition can breathe.
- Avoid screenshots, dense text, logos, watermarks, and images that only work because of bright color.
- Crop closer if the subject is too small, but do not crop so tight that important contours are cut off.
Ink Density
How to choose the right ink density
Ink density controls how strong the black ink and gray wash should feel. It does not change the uploaded image directly. It tells the generation step whether to favor pale diluted ink and more empty paper, or darker brush pressure and stronger contrast.
The default is balanced. If the result feels too heavy, lower ink density. If the subject feels too faint or lacks structure, raise ink density slightly.
- Use lower ink density for delicate portraits, soft couple images, pale compositions, and scenes where white space matters.
- Use medium ink density for most people, pets, plants, and object images.
- Use higher ink density when the subject needs stronger contour, darker gesture lines, or more dramatic contrast.
- If the result looks muddy, lower ink density and try a cleaner source image.
- If the result loses the subject, raise ink density or crop closer to the main form.
Workflow
Step-by-step image to ink wash sketch workflow
The workflow is simple, but small choices make a large difference. A clean source image and a sensible ink density setting usually matter more than repeatedly regenerating the same busy photo.
Upload a readable source image
Start with a photo where the subject is easy to identify. Remove extra clutter by cropping before upload if the background competes with the subject.
Set ink density
Move the ink density slider lower for a lighter wash or higher for stronger black brushwork. Start near the middle when you are unsure.
Generate the ink wash sketch
The output should preserve the subject and composition while replacing photo color with black ink, diluted gray wash, and clean white space.
Adjust and regenerate if needed
Use lower density when the result is too dark, higher density when the subject feels weak, and a simpler crop when small details confuse the composition.
Troubleshooting
How to fix ink wash sketches that look too heavy or unclear
Most weak ink wash results come from asking the style to preserve too much. Ink wash is strongest when it can simplify. If the source image has a busy background, tiny details, or a subject that depends on color, the result may feel muddy.
The fastest fix is usually to simplify the input, then adjust ink density. A cleaner crop gives the brushwork more room to describe the subject without filling the whole canvas.
- Too dark or muddy: lower ink density and use an image with less background texture.
- Subject too faint: raise ink density or crop closer so the main form is larger.
- White space disappears: lower ink density and avoid dense scenes.
- Looks like pencil hatching: regenerate with a cleaner source and keep the ink wash style selected.
- Text or logos become strange: avoid text-heavy images; this style is for subjects, not readable lettering.
Use Cases
Creative ways to use ink wash sketch images
Ink wash sketches work well when you want a result that feels more refined and quiet than a normal pencil sketch. The white background, brush texture, and limited black-gray palette make the style useful for elegant, minimal visuals.
Because the output is clean and monochrome, it can work for social posts, profile visuals, mood boards, stationery concepts, editorial mockups, and art references.
- Couple, portrait, pet, and family keepsake images with a calm monochrome feeling.
- Minimal art references for sketching, painting, and composition studies.
- Editorial visuals and mood boards that need a refined hand-made look.
- Social posts where a normal photo feels too literal.
- Simple object or plant studies on a clean white background.
FAQ
Image to ink wash sketch FAQ
These are the questions people usually ask before turning an image into a Chinese ink wash-inspired sketch.
What does ink density control?
Ink density controls how dark and full the brushwork should feel. Lower values create paler diluted wash and more white space. Higher values create stronger black strokes and richer gray layers.
Will it preserve the exact details of my image?
No. The style preserves the subject, silhouette, pose, and key contours, but it simplifies color and small detail into brush marks and wash gradients.
Can I use text, logos, or stamps?
This style is not designed for readable text or precise logo reproduction. It also avoids calligraphy, seals, stamps, borders, captions, and watermarks.
Is ink wash sketch different from watercolor?
Yes. Ink wash uses black ink and diluted gray wash on white paper. Watercolor often uses color fields and pigment blooms. This tool is tuned for monochrome brush-ink results.
What should I do if the result is too dark?
Lower ink density, use a simpler crop, and avoid images with heavy shadows or dense background texture.
Try the Ink Wash Sketch Tool
Upload an image, tune ink density, and create a clean Chinese brush-ink style sketch.
Create an ink wash sketch