Clean Line Drawings from Photos: What Works
Learn what source photos produce cleaner line drawings, how to prepare images before converting, and how to fix cluttered outline results before you print or trace them.
Quick Answer
The fastest way to make a clean line drawing from a photo
To turn a photo into a line drawing, start with a sharp image that has one clear subject or one readable scene, choose a line drawing or clean outline style, then review whether the important edges stay easy to follow. Good line drawings keep the structure of the original photo without dragging every shadow and texture into the final result.
That is what makes line drawing different from both pencil sketch and coloring page output. A pencil sketch keeps more tone and shading. A coloring page removes more interior detail. A line drawing sits in the middle: clean enough to trace or print, but detailed enough to still feel like the original subject.

Best Inputs
Why some photos turn into cleaner line drawings than others
A clean line drawing depends on edge clarity more than color beauty. The converter needs visible boundaries between doors and walls, petals and background, fur and face shape, or product edges and surrounding space. If those boundaries are clear in the source image, the final drawing usually looks intentional instead of messy.
The easiest way to judge a source photo is to imagine tracing it by hand. If you can quickly identify the three to five shapes that matter most, the line drawing has a good chance of working well.
- Keep one main subject, or one clearly framed scene, instead of several competing focal points.
- Let the main subject occupy roughly 60 to 80 percent of the frame so the outlines do not get lost.
- Use bright lighting with visible contrast around the edges of doors, faces, petals, products, or furniture.
- Avoid low-resolution screenshots, motion blur, and backgrounds packed with tiny repeating texture.
- If signs or lettering matter, use a straight-on photo with enough resolution that the letters stay readable.
Choose The Right Style
Line drawing vs pencil sketch vs coloring page
People often use these terms as if they mean the same thing, but they solve different problems. If you want something printable, traceable, or easy to read at a glance, the wrong style choice can add either too much shading or not enough detail.
Line drawing is often the safest middle option when you want structure without heavy tone. It keeps more information than a coloring page, but it stays cleaner and more functional than a textured sketch.
- Choose line drawing when you want readable structure, contour lines, and some interior detail.
- Choose pencil sketch when you want shading, texture, and a more hand-drawn artistic look.
- Choose coloring page when you want broad white space for crayons, markers, or classroom printing.
- If you plan to trace, annotate, mock up, or lightly color the result, line drawing is usually the better fit.
Workflow
Step-by-step: create a cleaner line drawing from a photo
You do not need design software to get a usable result. Most of the improvement comes from choosing the right source image, checking a few key areas, and making one practical revision if the first pass feels too dense.
Start with the cleanest crop
Before uploading, crop away anything that does not help the subject. If the most important building, face, product, or flower only occupies half the frame, the outlines will usually feel weaker than they need to.
Choose a line drawing or clean outline style
Pick the style that preserves edges without adding too much shading. If the result starts to look like graphite art instead of outline work, you are probably too close to pencil sketch territory.
Check the three focal areas first
Do not judge the whole drawing at once. Look at the three places the viewer will notice first: for example the sign, doorway, and window frame in a storefront scene, or the eyes, nose, and face silhouette in a portrait.
Preview at the final use size
Open the result at roughly 100 percent of the size you plan to print, trace, or share. Thin lines that look elegant on screen can disappear on paper, while cluttered interiors can feel heavier than expected when enlarged.
Troubleshooting
How to fix cluttered or muddy line drawing results
When a line drawing looks muddy, the problem is usually not that the converter failed. The problem is that the source photo contains more detail than the final use case needs. A good line drawing is selective. It should preserve the information that helps someone recognize the subject and simplify the rest.
That is why the fastest fix is often a better crop, a cleaner photo, or a simpler scene. Settings matter, but the source image still decides most of the outcome.
- If background lines overpower the subject, crop closer or use an angle with less visual clutter.
- If faces, flowers, or small objects feel muddy, use a larger source photo with stronger contrast.
- If straight edges wobble, start with a sharper image and avoid heavily compressed screenshots.
- If the drawing looks too empty, the photo may not have enough edge contrast or shape separation.
- If the result looks too busy, remove secondary objects that do not help the main silhouette.
Use Cases
Where photo to line drawing works especially well
Line drawing is strongest when the original photo already has structure. Architecture, storefronts, furniture, products, flowers, and portraits often convert well because their shapes are easy to follow even after color is removed.
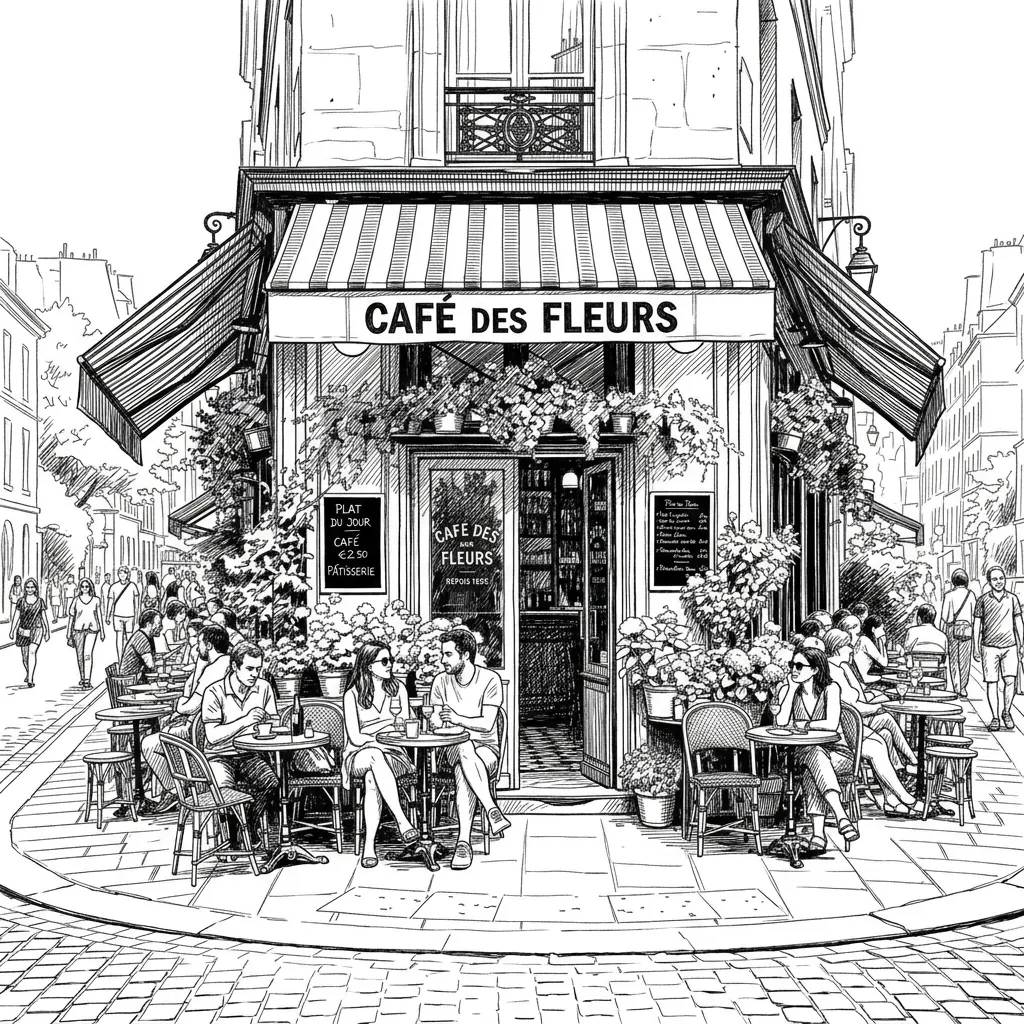
The cafe example above works because the awnings, doorway, tables, and street layout each form clear outlines. Even with many details, the scene still has a readable frame. That is exactly the kind of image that usually produces a useful line drawing rather than a chaotic one.
- Storefronts, cafes, and travel architecture that need readable exterior lines.
- Product photos for manuals, mockups, packaging, or presentation diagrams.
- Pet and portrait references when you want recognizable facial structure without heavy shading.
- Flowers, leaves, and botanical studies when petal or leaf edges are clearly separated.
- Craft prep, tracing, and printable references where clean structure matters more than color.
FAQ
Photo to line drawing FAQ
These are the questions people usually ask when they want a cleaner outline instead of a full sketch.
What is the best kind of photo for a line drawing?
The best photo has one clear subject or one readable scene, strong edge contrast, and limited background clutter. Sharp architecture, products, flowers, pets, and portraits usually work well.
Can a busy street or cafe scene still work?
Yes, but only if the scene still has a clear structure. A storefront with readable awnings, doors, and tables can work well. A crowd scene with no clear focal point usually becomes too noisy.
Is line drawing better than a coloring page for printing?
It depends on the goal. Line drawing is better when you want more structure and interior detail. A coloring page is better when you want broad white space and simpler shapes for coloring.
Do I need to edit the photo before uploading it?
Not always, but a tighter crop and a cleaner background often improve the result more than any later adjustment. Simple preparation usually saves time.
How do I make the outlines cleaner without losing too much detail?
Crop tighter, remove distracting background objects, use a sharper source image, and choose line drawing instead of a heavily shaded sketch style. Those changes usually keep the important shapes while reducing noise.
Try your own photo as line art
Upload a cafe, storefront, portrait, flower, product, or pet photo and compare the clean line drawing result with the original image.
Create line art in the workspace